 Austin Home
Austin Home
Austin Home
Bathroom cabinets face water every day. A wet towel, open shower door, or dripping faucet can slowly weaken wood and finishes. The damage often begins quietly. Swollen edges, loose laminate, dark seams, and a soft cabinet floor are early warning signs.
This guide explains how to protect bathroom cabinets from water damage through practical, repeatable habits. It covers sealing exposed edges, improving ventilation, controlling splashes, and checking plumbing connections. Experienced contractors commonly recommend moisture-resistant materials, silicone caulk, and prompt drying. Cabinet manufacturers also stress correct installation, especially around sinks and wall joints. These details matter because prevention usually costs less than replacing warped panels.
Small actions help.
Wipe spills quickly. Keep cabinet doors slightly open after a steamy shower, when appropriate. Use a tray beneath cleaning bottles, but inspect it regularly because trapped moisture can cause problems too. No method is perfect. Even a careful homeowner may overlook water behind a pipe or beneath a countertop lip. That is why a monthly inspection is useful. Run a dry cloth along seams and corners, then look for changes in color, smell, or texture. If swelling continues, identify the leak before repairing the surface. Professional assessment may be necessary when plumbing is hidden or mold is suspected. The goal is not to create a flawless bathroom. It is to reduce exposure, notice trouble early, and choose repairs based on evidence rather than guesswork.
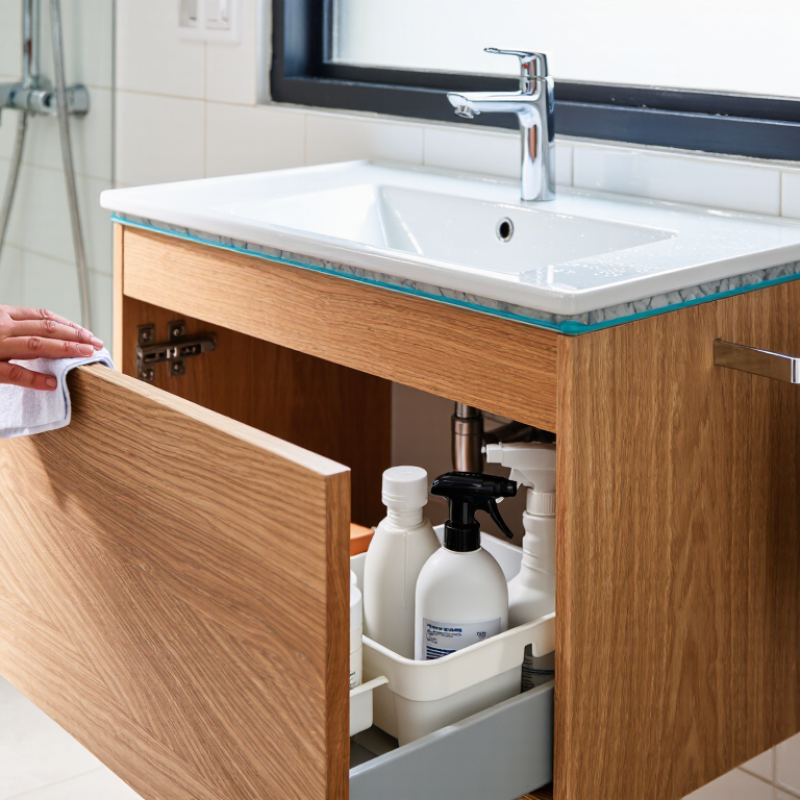
Before protecting a bathroom cabinet, identify its material and water-exposure points. Solid wood can tolerate brief splashes, but repeated moisture may swell joints or distort doors. Plywood usually holds its shape better, especially when its edges are sealed. MDF and particleboard are less forgiving; exposed cores can expand after one unnoticed leak. Looks can mislead. A sealed surface does not guarantee sealed edges.
Inspect beneath the sink, around hinges, and beside the shower. These areas collect droplets, condensation, and cleaning residue. Run a dry tissue along the bottom panel and pipe openings. Damp fibers, lifting veneer, soft corners, or a musty odor indicate ongoing exposure. Check after a shower, not only when the room is dry. Humidity matters. Poor ventilation can trap moisture for hours. I once blamed a swollen door on weak material, then found a slow valve leak. That mistake changed how I inspect cabinets.
Rate the risk by frequency, duration, and location of water contact. A cabinet facing a tub needs more caution than one across the room. Pay special attention to raw cutouts, seams, fasteners, and the floor beneath the unit. Seal vulnerable edges with a compatible coating, keep plumbing connections accessible, and dry splashes promptly. Do not rely on caulk alone; it can crack while the hidden panel absorbs moisture. Installation and daily habits often matter as much as the cabinet material.
| Cabinet Material | Typical Water Resistance | Common Water-Exposure Risks | Likely Damage if Water Enters | Best Protection Measures | Relative Risk | Recommended Use |
|---|---|---|---|---|---|---|
| Solid Wood | Moderate when fully sealed; wood remains absorbent at exposed edges and joints. | Standing water, leaking supply lines, wet towels, unsealed end grain, and repeated humidity changes. | Swelling, warping, raised grain, staining, loose joints, and finish deterioration. | Seal all faces and edges, wipe spills promptly, use a drip tray, maintain ventilation, and repair leaks immediately. | Medium | Suitable for well-ventilated bathrooms when regularly maintained. |
| Plywood | Moderate to high, depending on veneer quality, adhesive type, and edge sealing. | Water reaching cut edges, screw holes, bottom panels, or poorly sealed seams. | Edge swelling, veneer lifting, delamination, and loss of structural strength after prolonged exposure. | Use moisture-resistant construction, seal cut edges, protect the cabinet base, and keep plumbing connections dry. | Low–Medium | A practical choice for areas with occasional splashes and normal bathroom humidity. |
| Medium-Density Fiberboard (MDF) | Low to moderate; standard MDF absorbs water readily unless its surfaces and edges are thoroughly sealed. | Leaking pipes, wet floors, sink overflow, unsealed screw holes, and moisture trapped beneath the cabinet. | Rapid swelling, softening, edge breakdown, bubbling finishes, and permanent dimensional changes. | Prefer moisture-resistant panels, seal every exposed edge, elevate the cabinet from the floor, and avoid standing water. | High | Acceptable only when well sealed and protected from direct or prolonged water contact. |
| Particleboard | Low; the material can swell significantly when moisture penetrates the surface or edges. | Floor splashes, plumbing leaks, wet cleaning cloths, and damaged laminate or edge-banding. | Permanent swelling, crumbling edges, fastener loosening, delamination, and loss of load-bearing capacity. | Keep away from wet floors, seal all joints, use a waterproof base barrier, and inspect laminate and edge-banding regularly. | High | Best limited to dry locations with strong sealing and careful leak prevention. |
| Thermofoil over Engineered Wood | Moderate on intact faces; vulnerable at seams, corners, edges, and areas exposed to heat or peeling. | Water entering behind the film, failed adhesive, unsealed openings, and repeated steam exposure. | Peeling, bubbling, substrate swelling, discoloration, and difficult-to-repair surface failure. | Keep seams dry, prevent steam buildup, repair lifted film promptly, and use silicone-sealed plumbing penetrations. | Medium–High | Appropriate when edges are intact and the room has effective ventilation. |
| High-Pressure Laminate over Plywood | High on sealed faces; the core still requires protection at exposed edges, joints, and cutouts. | Damaged laminate, open seams, unsealed sink cutouts, and prolonged moisture at the cabinet base. | Core swelling, delamination, edge lifting, and staining after water reaches the substrate. | Seal cutouts and joints, use durable edge-banding, install a base shield, and clean spills without abrasive damage. | Low–Medium | Well suited to bathrooms when construction details are properly sealed. |
| PVC or Other Waterproof Polymer Board | High; the board itself resists water, although hardware, joints, and wall connections may still leak. | Water entering through fasteners, unsealed seams, hinges, plumbing openings, or adjacent wall surfaces. | Usually limited to hardware corrosion, staining, joint movement, or damage to adjoining materials. | Seal joints, use corrosion-resistant hardware, provide drainage where appropriate, and keep wall penetrations watertight. | Low | Suitable for high-splash areas and bathrooms with frequent moisture exposure. |
| Metal Cabinet with Protective Coating | High when the coating is intact; exposed scratches, seams, and dissimilar-metal joints remain vulnerable. | Standing water, chipped paint or powder coating, condensation, and poorly protected fasteners. | Surface corrosion, staining, coating failure, seized hardware, and corrosion at concealed seams. | Dry exposed surfaces, repair coating damage, use corrosion-resistant hardware, and prevent trapped moisture inside the cabinet. | Low–Medium | Effective in humid bathrooms when scratches and damaged coatings are repaired quickly. |
Assessment note: Water resistance depends on the complete cabinet system—not only the core material. Edges, joints, sink cutouts, plumbing penetrations, hardware, ventilation, and leak-response time can significantly change the actual risk.
Exposed edges, screw holes, joints, and plumbing cutouts usually fail before broad panels. Small gaps matter.
Seal raw wood, fiberboard, and cut edges with a bathroom-rated primer or clear protective coating. Apply thin coats. Let each coat dry completely.
It may sit near splashing water or damp flooring. Seal it carefully, then inspect it regularly for swelling, discoloration, or soft spots.
Remove dust and grease first. Press sealant into the joint instead of brushing over it. Smooth the bead with a damp finger or suitable tool.
No. They resist moisture but are not completely waterproof. Unfinished edges can still swell when water reaches the inner core.
Keep the cabinet level and slightly away from splash-prone walls where practical. Small clearance improves airflow and helps hidden surfaces dry.
Run the exhaust fan during showers and for several minutes afterward. Wipe cabinet fronts, handles, and nearby floors each day. Keep wet towels and bath mats away from cabinet doors.
Use a flashlight under the sink each week. Check supply lines, drain traps, corners, and plumbing openings. A shallow leak tray can reveal small drips.
Check them every few months for cracks, gaps, or dark staining. Clean and dry damaged areas fully before replacing sealant. Sealants help, but they are not magic.
The underside of the sink base may remain unsealed and hidden. I once missed that edge, and it swelled first. Water wins slowly.
Learning how to protect bathroom cabinets from water damage starts with understanding how different materials respond to moisture. Wood, laminate, and engineered panels may absorb water differently, while exposed edges, seams, and joints are often the most vulnerable areas. Seal these surfaces carefully with suitable moisture-resistant products, paying special attention to cut edges, hardware openings, and connections between cabinet panels. Proper installation also helps by keeping cabinets level, away from standing water, and protected from direct splashes.
Good ventilation is equally important. Use an exhaust fan, open windows when practical, and reduce lingering humidity after showers. Daily habits such as wiping spills quickly, drying wet countertops, and avoiding damp towels near cabinet doors can prevent repeated exposure. Inspect cabinets regularly for swelling, discoloration, loose finishes, or soft spots. Clean them with a lightly damp cloth rather than excessive water, and repair small problems promptly so moisture does not spread into the cabinet structure.
